
Tangy, spicy, and packed with flavour, Nova Scotia Green Tomato Chow Chow will add zest to any sandwich or dinner plate that needs a jolt of flavour. Find out how to make this simple green tomato relish, and how to preserve it with hot water bath canning.
This is a long post with lots and lots of photos.
I’m going to tell you every step I took to make this condiment. There are a lot of bits of information in here that you’ll miss if you’re jumping to the recipe. BUT if you’re experienced at making pickles, and you don’t want all the funny bits, jump away.
What is Green Tomato Chow Chow?
Ah, now there is a question, and the answer to what ingredients are IN your Chow Chow depends on where you LIVE.
In the southern US, Chow Chow has green tomato, green cabbage, onion, and red bell pepper.
In the northern US, it has all of those AND can include cauliflower, beans, hot red pepper, and more.
But I am not in the southern or northern United States. I’m in Canada, specifically Nova Scotia in the Maritimes. And when you’re here, the recipe is made from green tomatoes and white onions.
So there is one definitive Nova Scotia recipe?
No. There are guidelines.
You can make it very sweet. The Chow Chow recipe I followed was for a very sweet pickle. My mom uses about half that amount of sugar (just regular white sugar).
You can use a lot of pickling spice in a cloth bag …. or like my aunt, you can use some mustard and celery seed and leave them in. Mom says ‘I HATE finding seeds in my Chow Chow!’
Right – they’re sisters and they do this classic Maritime condiment differently.
You can use pure white vinegar if you like a strong pickle. Or you can dilute it with water.
I’ll cover a lot of these variations as we go along. As long as you know why you’re doing it, there a lot of variations.
Back Up – What’s Pickling Spice?
I have to remember to define these things. I have a post about making cod cakes, which I thought was great until I realized lots of people have never seen salt cod. Oops.
Pickling spice is a blend of different spices.
The specific ingredients in pickling spice can vary depending on the recipe, but some common ingredients include mustard seed, peppercorns, bay leaves, allspice berries, coriander seeds, cinnamon sticks, whole cloves, and ginger.
Other ingredients can include celery seeds, dried chili peppers, mace, and cardamom seeds.
Is Chutney and Chow Chow the Same? Why Is it Called That, Anyway?
They’re not the same. Chow chow is a North American pickled relish made with vegetables and a certain flavor profile. Chutney is South Asian and is a mixture of fruit and vegetables with completely different spices.
As for the name … take your pick:
It sounds a bit like the Chinese word for mixture. In Chinese-English pidgin, “chow chow” meant mixed food. There’s also a Chinese breed of dog called Chow Chow that’s bred for a variety of tasks.
It also sounds a bit like “chaud”, which is French for hot.
Or perhaps it comes from “chou”, which is French for cabbage. That makes less sense in Nova Scotia, obviously.
But What Can I Use It On (or With?)? How Do I Serve It?
Serve it on hot dogs or burgers.
Spread a little on a grilled ham steak.
It’s great on pork sandwiches and even sloppy joes.
Spice it up a bit with some horseradish and you have a delicious sauce for roast big or ham.
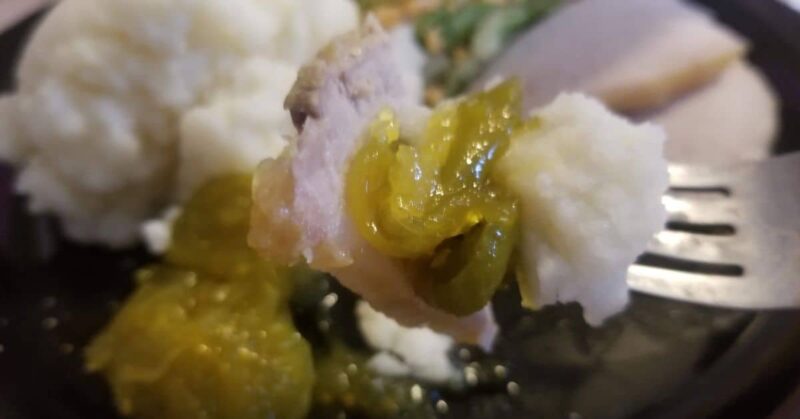
Serve it as a side dish (a little bit scooped onto your plate) with mashed potatoes and any type of meat.
Mix a bit with cream cheese for a quick and tasty vegetable dip.
Chop some very fine and mix it into the egg yolk mixture for deviled eggs.
Who Wants Some Green Tomatoes …?
This all started when my aunt let me know that she had green tomatoes that needed a home.
Anyone remember when I broke my foot in May? These were the tomato plants that I had started but knew I couldn’t plant out, so I sent them off to new homes, and oh boy did they produce!
It’s quite a sad thing to be all prepared for your garden and then have life knock things sideways, but it’s wonderful when the plants produce food AND extra!
“If the tomatoes haven’t found a home, I want to make a batch of Chow Chow!”
No, there are no photos of me trying to balance without my cane, and my aunt, pulling out tomatoes and tossing them into her big colander.
And of course we’re socially distancing while we do it. Which I HATE. I miss people and I miss hugs, but we all need to be thinking of everyone else these days.

But I did come out of it with a full shopping bag. Romas and Beefsteaks – any kind will work. And yes, that solitary slightly red one.
Making pickles – including Chow Chow – is a two day process. So after I left my aunt’s house, I headed to the grocery store to pick up a bag of yellow onions.
My little girls helped me pick out the bad tomatoes and take off the leaves.
How Many Tomatoes?
Look at that – a Tupperware Thatsa Bowl is a Very Large Bowl!!! It holds 48 cups and it’s pretty much full. This is going to be interesting.

So how many?
“About this much. An overflowing plastic shopping bag. An almost full Thatsa bowl. Aunt Pat’s big strainer until it can’t hold more.”
If this kind of measuring makes sense to you, consider visiting the Canadian Maritimes.
We also give directions like “I’ll meet you at the old mall” (which hasn’t been a mall in decades) or “Just get on the highway and take the ferry exit, then go out to Caribou” (EJ wants you to know that NONE of the signs say any of that!).
We have lots of places that have never been on a map, like Blue Acres and “the west side”.
Aunt Pat says “The original recipe says 8 quarts after they’re cut up – I don’t know much that is in tomatoes. But if we put them into this strainer until we can’t fit any more in, that’s a batch.”
And so that’s what we did.

8 quarts would be 34 cups, which is more or less what this yielded.
I’m lousy at math. 8 quarts (as a reader corrected me) is either 32 cups or 40 cups. However, it does NOT matter! Don’t stress out over measuring the tomatoes. 🙂
“About this much.”
“An overflowing plastic shopping bag.”
“An almost full Thatsa bowl.”
“Aunt Pat’s big plastic colander until it can’t hold more.”
Thoughts on Cutting Them Up
Cutting up green tomatoes is not at all like cutting up red, ripe ones. They’re firm, like green peppers.
If I were making this with round tomatoes, I would have cut them in wedges. But since these are mostly green Romas, I sliced them.
SOME people chop them up finely. My mom says she chops them into small cubes, which … okay.
That’s not what I remember from childhood (and we ate a lot of this stuff). I thought she did wedges. But maybe she’s changed it over the years.
It’s a very flexible recipe!

How do you slice a bag of onions?
Not by hand, thank you very much. I have a lovely 12 cup Hamilton Beach food processor which took care of that.
How many cups onions? About this much. Honestly, I never measured what 5 pounds of onions look like.
There are many ways to cut onions without crying, but some of them may not work for everyone. Here are some that you can:
Refrigerate or freeze your onions before cutting them. This slows down the release of the chemicals that irritate your eyes. (For this recipe, I don’t think freezing them is a good idea)
Use a sharp knife and cut quickly. This reduces the amount of damage to the onion cells and minimizes the exposure to the gas.
Wear goggles or eye protection. This prevents the gas from reaching your eyes.
Keep the sliced side of the onion down on your cutting board. This blocks some of the gas from escaping into the air.
Cut near a fan, a vent, or a window. This helps disperse the gas away from your face.
Chew gum, bread, or an Oreo cookie while cutting. This forces you to breathe through your mouth and reduces the amount of gas that enters your nose or eyes (although this method may not work for everyone).

The only issue I had with my method – get them all run through the food processor as quickly as possible – is that we were all sharing the misery. The house was full of onion fumes so that everyone’s eyes were burning.
In the end, there may not be a way to slice a whole bag of onions without crying.
It will be WORTH it when the pickles are done!
Brining the pickles

Sprinkle the vegetables with plenty of pickling salt.
Now, ‘how much salt’ is going to be your next question.
All pickles are brined.
Some are brined overnight and then pickled in a vinegar solution.
Others are brined and lacto-fermented without any vinegar.
So what we are doing with this recipe is a short overnight brine. It will be rinsed off in the morning.
A lot of recipes say ‘sprinkle generously’, which doesn’t mean sprinkle a teaspoon on top.
Some say about 3 Tablespoons salt for 20 pounds vegetables – which doesn’t strike me as very generous, but it’s a good amount.
Much more than that and your finished pickle will be too salty, though. You’re looking for that happy medium between “not enough to brine” and “gaaagghh, I’m being mummified from inside”.
With the vegetables and salt, I could barely get the lid on!

And if you’re wondering about refrigeration – I don’t. I just leave my pickles on the counter overnight with the lid on.
This will not go bad on the counter. Not overnight and probably not if you left it all week. (It might ferment, but that’s not the same thing.)
Draining, Rinsing, and Cooking
Look at these beautiful brined vegetables. The volume of this yummy mixture dropped considerably overnight.

Instead of the bowl being stuffed to bursting, there’s plenty of room – AND a lot of salty liquid.
Aonghus keeps sneaking into the kitchen and stealing bits of it.
There is no use that I know of for that salty brine. Down the drain it goes. Rinse as much of the salt as you can from the drained vegetables using plenty of cold water. It’s okay – you won’t get it all.


Taste it, though – if the veggies are super salty, ask yourself if you really want to add more to the cooking liquid. I didn’t.
They should taste GOOD. Like ‘I’d definitely toss this with salad dressing and eat this as a salad’ good.
Yes, It’s a Sweet Pickle
Okay, fair warning – there’s a lot of sugar in this. So don’t be shocked. And yes, my “sugar jar” is a Rubbermaid tub. (And no, that isn’t all of my sugar, just my kitchen supply. The rest is in storage.)

But the good part is that you can adjust the sugar. My mother uses about half this amount, but I wanted a sweet pickle.
And if you’re wondering, a pint jar filled to the brim is 2 cups. (And a half pint makes a great 1 cup measure when the kids hide your measuring cups)
The sugar and the vinegar go into the pot. You CAN dilute it if you don’t like as much vinegar bite. How much water, though – you can’t just add water all willy-nilly and expect success.
The general rule is 2/3 vinegar to 1/3 water – no more water than that. So since I’m using 3 cups vinegar, I could replace up to 1 cup of the vinegar with water. I don’t, though.
Confession Time – I’m Not a Super Serious “Pro”
At this point, we’re separating the cooks who take themselves super seriously from the rest of us goofballs.
I forgot to buy cheesecloth. I had to go to the grocery store to get the onions and spices and I forgot to get cheesecloth. I live about 5 miles from the grocery – definitely not a huge distance, but long enough that I’m not driving in for a package of cheesecloth.
And in order to make chow chow, unless you want to be biting bits of mustard seed, you need a spice bag … which is a cheesecloth bag that you tie shut and toss in the pot.

So … I found a clean, well-worn old cotton napkin.
It’s not big enough for a ‘dinner napkin’ so … lunch? It’s the perfect size to hold the spices.

My mom says “That would work in my house. If you use a sock, make sure it’s clean.”

Oh, if you’re wondering why I’m so cavalier in the kitchen, I come by it quite honestly. (I’ve never used a sock, by the way. But the little cheesecloth bags intended for turkey stuffing – they’re great.)
From my mom’s sister dumping her beans into the sink so we can use her large colander to measure tomatoes … to my mother suggesting an old sock for the spices … it’s not my fault I’m strange!
Someday I’ll ship the kids OUT of the house for the day, get my mother and little sister and my aunt in one kitchen and hit record on my phone. That will be, as my teens say, lit.

How Much Spice?
A note on spice – my aunt uses about a Tablespoon or so each of mustard seed and celery seed. If you don’t like a pickle with BITE, you can do that, too. Either leave it in as she does, or wrap it up in a cloth bag.
I have *tried* using dry mustard powder and it didn’t work – your mileage may vary.
The rule is, clearly, that there are no rules!
Yes, there are rules – green tomatoes, onions, some kind of pickling spice, vinegar, and sugar …. in some sort of proportion that makes you happy … cooked together until heavenly and delicious.

Look at this, though! My house smells like pickling spice and vinegar and oh, I’m getting hungry.
Stir and simmer.
Stir and simmer.

This onion and tomato mixture cooks for 1 1/2 – 2 1/2 hours “or until it’s cooked down and the right consistency” which is not helpful if you don’t know the right consistency! No worries – I’ll show you.
Get Your Canning Pot Ready
My big old canning pot has been sitting in the basement for a while, so the first thing I did was tighten up those handles. Yes, I’m using an old steak knife to screw them in.

And … the second thing is that I think I need a new canner. It still works for a boiling water bath, but I don’t trust this lid anymore. The vents are rusted badly and the gauge is very wobbly.
So basically, it’s not so much a canning pot anymore as it is a very large pot with incredibly thick, heavy walls.

While the chow cooked, I got everything ready. I’m not pressure canning (which is good because this lid is just about done), but I’ll still use the lid – a covered pot boils faster.
This flat little disk goes in the bottom of the canning pot and it keeps the jars from sitting directly on the bottom.

Normal people have one, maybe two.
I have three. Luckily, I don’t even pretend to be normal.
In case you’re not familiar with canning tongs, the BLACK part is the handle. Don’t worry – I think almost everyone tries to pick up a jar or three using the black part.
It’s MUCH easier and safer to do it the right way. The red part grips the jar perfectly.

A Word on Lids
You do not have to boil the flats. In fact, I don’t think you should boil them at all. They’re meant to soften in hot water. Since the jars will be boiled after filling, that’s all you need to do.
I meant to turn off the heat under the saucepan as soon as it got hot, before it boiled, but I do have four children so distractions happen. (Try to minimize distractions when pickling.)
Once upon a time I had a little magnetic wand that let me pick up the lids, but it has disappeared. And metal tongs work just fine.
Fingers do NOT, though.
The entire goal is to bring your piping hot jar to the table, add hot pickle, wipe the lid, add a lid (with a softened rubber edge), get the ring, and then get your filled jars back in the boiling water before they cool off.
Again – if you heat process your jars after filling, all bacteria will be killed. What you are trying to do, with all of this boiling, is to keep the jars at the same temperature as the pickles and the boiling water. Thermal shock – what happens when a cold jar of pickles hits boiling water or a hot jar of pickles hits cold water – will make your jar shatter.
Try to avoid that.

Did You Remember the Turmeric?
At this point, my mother texts me:
“Did you add turmeric for the right colour?”
Insert face palm here.
“I forgot to mention that when we were chatting earlier,” she adds helpfully.
This was EASILY fixed, though. I sprinkled about 2 Tablespoons turmeric into the pickle and stirred it very well, turning it from bland yellow-ish …

to a nice green.
There’s science in there, which explains how an orange spice can make a bland yellowish pickle into a pretty green one.
All I care is that it works.
It is COMPLETELY optional. I’ve known plenty of people who don’t add turmeric because they don’t mind pale pickles. And that means that the amount used is up to you.
Time to Fill the Jars
So my pickle is pretty much cooked down. Jars are in my big pot on the stove and the water has been boiling for a few minutes, so they’re sterilized.
Lift out ONE jar.

Carefully, oh, so carefully, tip the water out and try not to get boiling water dripping down your arm. (It hurts. A lot. And then you drop the jar and … that’s all bad.)

I put my jars on a dishtowel so that it’s not sitting directly on my table. Does it matter? I really don’t know. *shrug* But I’ve always done it. (Yes, that’s my turmeric in the background)
A wide mouthed canning lid can mean the difference between a mess and a nicely filled jar.

There are only a few things that I use paper towel for. Wiping jar lids is one of them. You can use a damp cloth. (I’m truly not sure which is more hygienic.)
As soon as the jar is full, very quickly wipe around it with clean paper towel. Drops of sticky liquid on the rim can wreck the ability of your jar to seal.

And you don’t want to go to all this trouble to have your seals fail.
Add the hot lid – right from hot water to jar.

Finger Tight Lids
And then put the ring on finger tight.
This does NOT mean you grab the jar with one hand (ow??) and the ring with another and tighten as much as you can, nor does it mean put it on lose like your arthritic great-grandma who shouldn’t be left alone in the kitchen would put it on.
It means as tight as an average adult woman can reasonably tighten it with her fingers while gingerly trying to hold a boiling hot jar with a thin towel and not get burned.
The entire purpose of the ring is to keep the lid flat against the jar rim until it seals. The RING doesn’t keep the lid on. If it’s on like a vice-grip, that can actually prevent the seal from forming.

Back into the water you go before it has a chance to cool off.

Now it’s time to put the lid on the pot and let the whole thing come to a boil.

Boil – BIG bubbly boiling – for fifteen minutes.
Set a timer because that will seem like a long time.

At the end of the fifteen minutes, turn off the heat and remove the jars back to the towel. Or a clean one if that one got covered with drips.

One thing I started doing a number of years ago, which really lessened my number of failed seals, was to drape a heavy towel over my jars as they were cooling.
I do NOT know why slowing down the cooling would help the seal rate, but it does.

Nine sealed jars of Nova Scotia Green Tomato Chow Chow. There was enough for a dish that I’m giving a friend and a dish that we had with supper.
I need more tomatoes.

I need all the green tomatoes.
Tangy, spicy, and packed with flavour, this sweet pickle will add zest to any sandwich or dinner plate that needs a jolt of flavour.
A serving of this is about a tablespoon, but you might want more. 🙂
In February, an old friend who got a jar of this called me to say “I forgot to serve the chow at Christmas, which was great because I’m now eating it out of the jar with a spoon. All by myself.”

But, Marie, My Mom Doesn’t Boil the Filled Jars and We’re Still Alive
I’m not going to argue with your mom, okay?
BUT if you’d like to see the discussion I had with my mom and how I convinced her to change her wanton dangerous ways, go read Old Fashioned Canning Methods – Still Not Safe.
My mom went from open kettle canning (that method where you fill hot jars with hot food, add the lid, and pray) to being the BIGGEST advocate for safe canning methods.
You should see her lecturing a group of church ladies on why and how we safely can foods – it’s awesome.
But it comes down to this – if you can the “old-fashioned way”*, you need to keep your pickles in a dark place, make sure they’re never disturbed, keep the temperatures LOW, and you’ll still lose a bunch to spoilage.
* In the 1972 copy of Putting Food By, they complained that they’ve been trying for 30 years to get people to stop open kettle canning. So we’re passed the point of “old fashioned” and well into “dangerously outdated” since food scientists have been preaching this for 80 years.

- Beausoleil, Marie (Author)
- English (Publication Language)
- 294 Pages – 06/18/2018 (Publication Date) -…
Nova Scotia Green Tomato Chow Chow
Ingredients
- 32 cup green tomatoes (sliced, wedges, or chopped)
- 5 pounds onions, sliced
- 1/3 cup pickling salt
- 3 cups vinegar
- 6 cups granulated sugar
- 1 cup pickling spice in a cheesecloth bag
Instructions
IDepending on how fine you want the final product, and the kind of tomatoes you are using (Beefsteak, Roma, etc), you can slice them, cut them into cubes, or chop the tomatoes.
Peel and slice the onions. Don’t worry about fancy – a food processor does a perfectly fine job.
In a large pot or bowl (I used a 42 cup bowl with a lid), sprinkle the tomatoes and onions well with salt, and let sit overnight covered. They do not have to be refrigerated.
In the morning, rinse the tomatoes and onions to remove the salt and drain the liquid off. Discard the brining liquid. The vegetables will have reduced considerably in volume.
Tie the spices in a cloth (cotton or cheesecloth) bag. This amount of spice will make a pickle with plenty of bite, and you can use much less and still have a good chow. One variation is to use 2 Tablespoons each celery seed and mustard seed, and put them directly in the pickle without a cloth bag.
Not everyone likes a strong vinegar taste. Replacing up to 1/3 of the vinegar with water will still work. Do not go less than that.
n a large pot, combine vegetables, vinegar (and water, if using), sugar, and spices.
Cook on medium heat for ABOUT 2 hours, stirring often.
The mixture will cook down and thicken.
Follow SAFE, up to date canning methods (defer to official recommendations over this recipe). Fill 6 pint jars with hot pickle, add canning lids and rings, and process in a boiling water bath for 15 minutes.
If any is left after filling the jars, place it in a container in the refrigerator and use within a week or so.
Let cool completely and test the lids. Any that do not seal should be refrigerated.

So enjoyed reading the whole friggin thing! Love chow, haven’t made any for years, actually, don’t remember if I ever did , maybe mom made it for us, but it was cool good! And it was fun, yeah, she made it, we helped, like you, a kitchen full of mom me, and 3 sisters. Thanks for making my day!
I’m so glad you enjoyed it. 😀
In the recipe, it states that “8 quarts would be 34 cups”. This is erroneous. In the Canadian system, 8 quarts = 40 cups. In the American system, 8 quarts = 32 cups. Also note that Canadian and American ounces are not the same. For this, and and other reasons, it is far preferable to use the metric system. Furthermore, it is also much better to measure all ingredients by weight rather than volume.
You’re right. I made a math boo-boo. 🙂
However, there is absolutely nothing exact in measuring the vegetables in this recipe. I’ve updated that bit to show that I’m terrible at math and to clarify exactly how me, my aunt, and my mother measure the tomatoes.
Do you think this recipe would work with green cherry tomatoes?
I can SAY that I’ve used both beefsteak and roma without an issue.
AND it is definitely possible to pickle green cherry tomatoes.
Those are two things I can say with certainty.
So I can’t see any reason why you couldn’t use at least partly cherry tomatoes. When they’re green, all tomatoes seem to be hard and with minimal juice.
I think I’d still want to slice them in half for the brining, which might be kind of tedious.
Sounds just like my mom’s/grand mom’s. Have you ever tried it with red onions? I am wondering if they will ‘bleed’. I have lots of them and thought I might give it a go.
I haven’t tried that, no. However, I do have another pickle recipe with red onions and I’ve never noticed them “bleeding”. And there are so many variations on chow chow – I’m sure someone, somewhere, has added red onions because that’s what they had. Since variations have cabbage, red pepper, and so much more, I can’t see a reason why it would NOT work. If you do give it a try, I’d love to see how it turns out. Maybe just do a small batch to test.
This looks perfect! Oy! Do I have green tomatoes! Maybe a bit of garlic and Turmeric? Have you tried with either?
There IS turmeric in it. 🙂 In the post, I mention where I forgot to add it and stirred it in near the end. I’ve never tried garlic, though.
How much tumeric do you add?
I have to admit, I eyeballed it. 🙂 You don’t need a lot – I think I used about 2 tablespoons in the entire batch. It’s an optional ingredient, used only to make the pickles more green, and not everyone uses it. One thing to remember if you’re concerned about adding the wrong amount – the flavor is very mild and a bit more or less is not going to affect the taste of your pickles.
Thoroughly enjoyed the tradition and saga of your family canning experience. It took a lot of stress out of the process, and I appreciate the sharing. You remind me of me!! I used apple cider vinegar and mine is a bit too vinegar-y, so would white vinegar be less strong? Hmmm, probably not. Visited St John & Halifax on a wonderful cruise pre-COVID. If you’re ever in central NC USA, you are welcome in my home!!
I’ve never been to North Carolina. 🙂 The only place in Southern US I’ve been is Texas. I hear you have some amazing barbecue in your state.
Excellent recipe! I didn’t bother with the pickling spice, I just used your suggested alternative of mustard seed and celery seed. I also used half the amount of celery seed because I find it quite strong. And I remembered the turmeric! Very good, very simple and it turned out very yummy! Thank you for sharing!
Awesome recipe , love it ! Easy enough for newbie to preserving
If I can’t find pickling salt, what would be a good alternative and amount?
I’m curious as to why you wouldn’t be able to find pickling salt. It’s carried in every grocery store I’ve ever been in, including Walmart. (Not questioning that you can’t find it, simply very curious about the situation).
Pickling salt is PURE granulated sodium without any additives.
First, I wouldn’t recommend regular table salt. Just step away from that altogether. It has non-caking agents that will make your pickles look awful.
Sea salt is pure but the grains aren’t irregular and make conversion a nightmare.
Kosher salt is your best bet. For every cup of Pickling Salt, use 1 1/2 cups Kosher Salt. It shouldn’t be saltier – the extra 1/2 cup allows for the difference in salt grains.
Can’t wait to eat this delicious chow! But after two hours on simmer with the lid on the pot it is still a bit runny.Maybe my quantities were off. Can I boil it down to get the right consistency or do you have any suggestions? Thanks!
I’m sorry I didn’t see this earlier! I’d just scoop it out with a slotted spoon and discard the liquid you don’t use.